
This guide is designed as a starting point for further research and training, and is not medical advice. Please take the time to learn about CPR and techniques to utilize in case of emergency.
While camping, hiking, and exploring the great outdoors is always a good time, there’s always a chance that injury or illness can strike. It’s important that you’re prepared for a variety of scenarios, including dealing with a variety of injuries such as cuts, scratches, sprains, broken bones, and illnesses and ailments such as dehydration, heat stroke, hypothermia, and shock (to name a few).
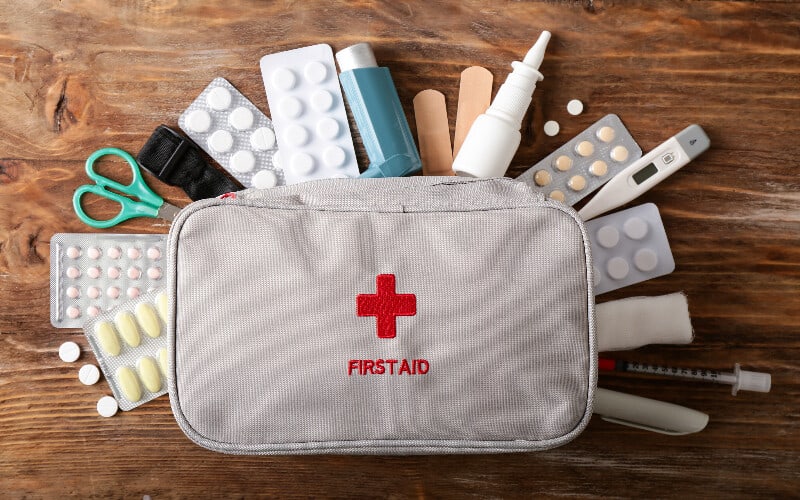
In this guide we’ll look at the essential items a good first aid kit should contain so you can be prepared for any kind of emergency situation, and we’ll help you source the items you need to build your own kit as well as provide reviews for the best first aid kits on the market.
Contents
First Aid Preparation
First Aid Training
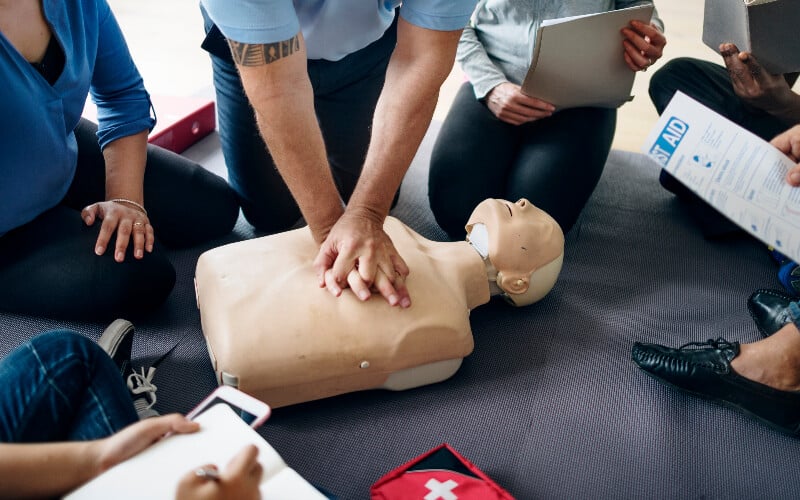
It’s important to note that all the equipment in the world won’t be of much help if you don’t know how to treat the various injuries and ailments that can occur. Before your next camping trip or backpacking trip, take the time to prepare by taking a first aid class either locally or online. It only takes a bit of effort and doesn’t take long, but you’ll be much more prepared for your next outdoor adventures.
First Aid Manual
In addition, you should consider investing in a first aid manual. A manual will help provide instructions for how to care for various injuries and ailments, and is important to have if you aren’t sure how to properly handle a specific issue. You may be able to pull up online instructions if you have your smartphone handy and have a strong enough signal, but if you find yourself in the backwoods with no signal or a dead phone, you’ll be glad you brought along a physical manual.
Click here for a list of the best first aid manuals on the market.
Along with your first aid knowledge, you’ll need the right items for your aid and survival kit-we’ll look at the key items below. Ideally you’ll be able to find a balance between having all the equipment you need in your first aid kit, while not taking up too much room in your bag (this is especially important if you’re a hiker-you may not have to worry about space as much if you’re camping in one spot).
Treating Cuts & Scrapes
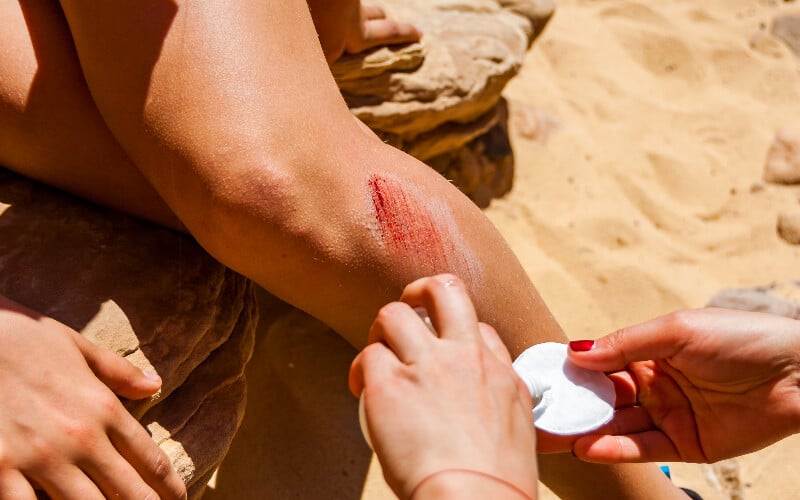
Cuts and scrapes are bound to happen while you’re out in nature, so it’s important you’re prepared and act fast to stop any bleeding and prevent infections. Fortunately, you only need a few items to treat most cuts and scrapes quickly and effectively.
Cleaning Wounds
Irrigation Syringes
While you may be able to adequately clean a wound by splashing clean water on it, an irrigation syringe is much more effective. With a syringe, you can get deep down and flush debris out before continuing treatment.
If you’re building your own camping first aid kit, take a look at the best irrigation syringes on the market and add one to your first aid kit before your next outing.
Antiseptic Wipes
After you’ve fully flushed a wound with clean water, use an antiseptic wipe to kill germs and disinfect the injury before applying ointments and applying a bandage. Depending on the type of wound and the type of wipe, you may want to avoid applying the wipe directly to the injury as it may sting.
There are a lot of options on the market, so check our reviews on the best antiseptic wipe packs on the market to find the right ones for your first aid kit.
Antibiotic Ointment
After you’ve thoroughly cleaned a wound with water and antiseptic wipes, you’ll usually want to apply an antibiotic ointment to the wound in order to further reduce the chances of an infection and promote faster healing.
It can be difficult to choose the best ointment, so we’ve put together a list of the antibiotic ointments to keep in your first aid kit.
Important: Don’t use hydrogen peroxide on cuts and scrapes. While people believe it can help clean wounds, it actually damages the tissue as well and can delay the healing process.
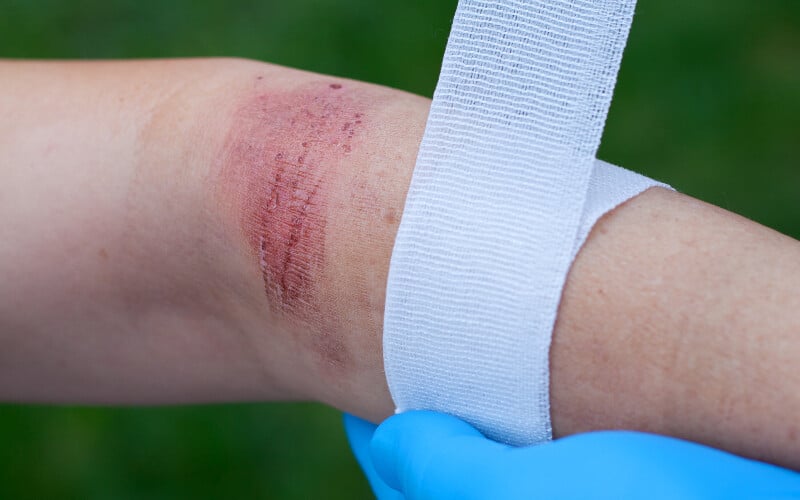
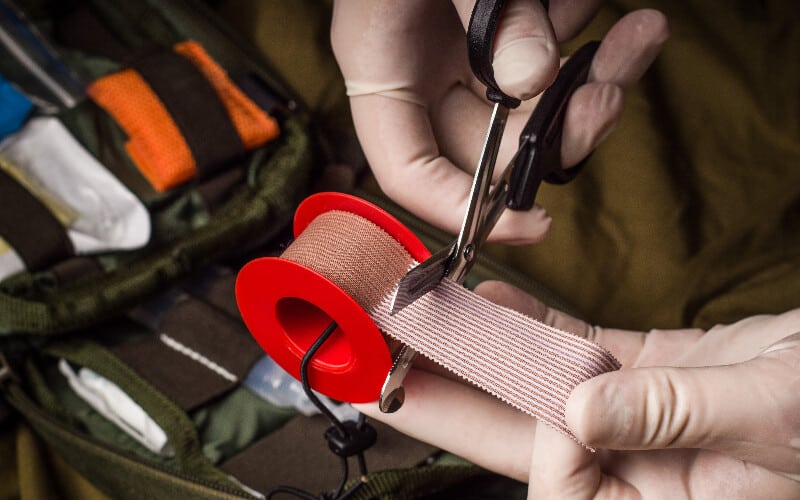
Covering Cuts & Scrapes
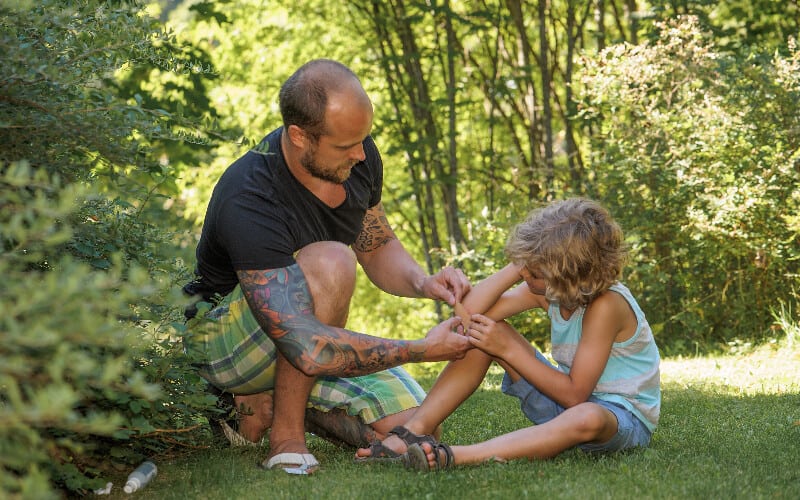
Once you’ve disinfected, it’s important to cover it to keep it clean to help prevent it from getting infected. There are several types of coverings you can utilize, with the most common being gauze pads, elastic bandages, and adhesive bandages.
Gauze Pads
Gauze is an essential item for any camping first aid kit for a number of reasons. Each gauze pad is individually wrapped to keep it sterile, and can be cut to any size to cover not just cuts and scrapes, but also burns and other skin injuries. Its breathable fabric provides protection for your wound while allow just enough air to the wound to promote healing while minimizing exposure.
Just be sure to bring along medical tape so you can properly fasten the gauze and keep it secure around injuries. Medical tape is designed to stick to skin while remaining easy to remove without causing more pain.
Elastic Bandage
Elastic Bandages are another key item you’ll want in your first aid kit. An elastic bandage is used to wrap sprains and strains. It helps to compress the injury and create pressure, thereby reducing the blood flow to the injured area and restricting swelling.
Adhesive Bandage
For minor cuts and scrapes, an adhesive bandage may be a better choice. These bandages are smaller and a better choice for minor wounds where using gauze pads and tape is overkill. Your medical kit should include several different sizes of adhesive bandages so you’re prepared for cuts and injuries of different sizes.
Disposable Medical Gloves
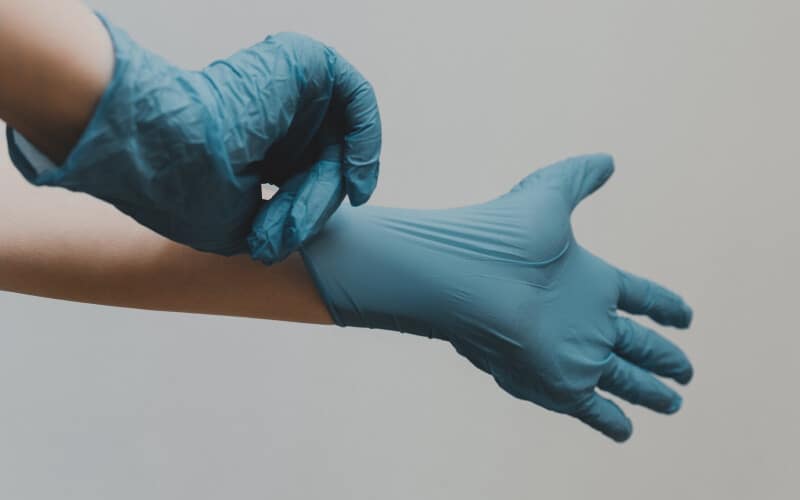
Disposable gloves are a must-have in any first aid kit. They take up very little space and are essential when it comes to treating open wounds. If you’re with someone who suffers an injury that starts bleeding, you’ll want to use medical gloves to protect yourself while treating the injury. Likewise, if someone is treating your injury, the gloves will help protect them from exposure to bodily fluids.
Nitrile glove vs latex glove: Latex gloves have been a favorite choice among medical professionals due to their comfort, flexibility, and low cost. However, latex allergies are fairly common, so it may not be an ideal material if the wearer or patient is allergic. Nitrile is a popular alternative material–nitrile gloves are not as flexible but are more durable and are more resistant to punctures and chemicals… plus, they don’t trigger allergies like latex can.
Burns and Blisters
Burns are another common outdoor-related injury. From overexposure to the sun to touching hot cooking equipment, there are a number of ways that a person can be burned while out in the wilderness. Burns can vary in severity from minor to severe, and it’s important to have the right medical supplies and knowledge to treat burns quickly and effectively.
First Degree Burns
These burns are the least severe, affecting only the outermost layer of skin called the epidermis. While they can be slightly painful to the touch, they’re usually more of an annoyance than a true source of pain (such as typical sunburns).
These superficial burns are best treated by applying aloe or burn cream to the affected areas, hydrating frequently, and minimizing further exposure to the sun and heat. These burns should clear up within a few days on their own, and cold showers once you’re home from your camping, hiking, or backpacking adventure.
Second Degree Burns
More severe burns go below the surface of the skin down to the dermis. These burns are more painful because they can irritate your blood capillaries and nerve endings, and your skin will likely blister and may ooze or bleed.
Burns of this severity should be treated by pouring cool water on the affected area for 10-15 minutes. When you’re out in the wilderness you may not have the option to use to much water, so be sure to carry a cold pack or cold compress in your adventure medical kit.
It’s important not to apply ice directly to the burn. Doing so can lower body temperature and cause more damage. Similarly, don’t apply burn cream or other ointments, and don’t break any blisters–doing so can cause infection.
Burns of this severity will usually heal within one to three weeks, and each blister should slowly heal on its own, but if the affected area is large it’s a good idea to seek medical attention as soon as possible.
Third Degree Burns
A third degree burn is an even more serious type of burn, and occurs when a burn extends down into the fat layer below the dermis. Skin that has suffered a third degree burn may appear blackened, charred, leathery, white, and/or stiff.
For burns this severe (or worse), the best course of action is to loosely cover the burned area with sterile nonstick bandages and immediately seek professional medical attention. Wounds of this severity won’t heal on their own, and will likely need to be treated with skin grafts.
Blisters
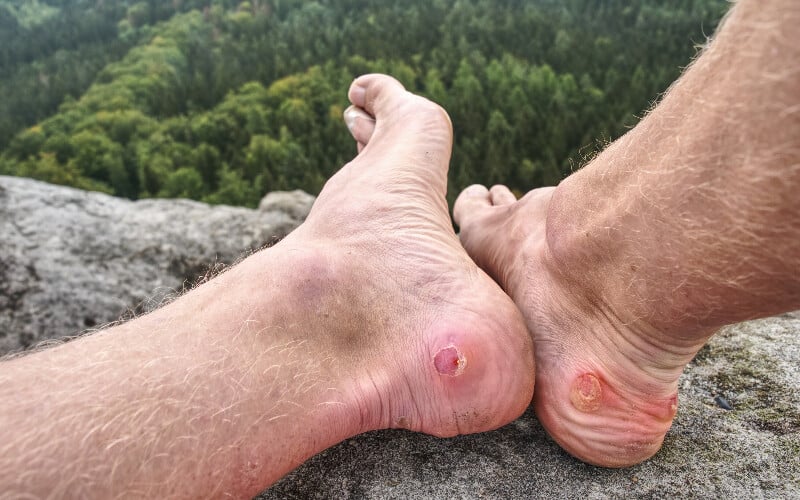
While second degree burns (and higher) can cause blisters, you can also experience blisters from friction. This is especially common if you’re out hiking long distances. To help protect blisters from further irritation, keep moleskin in your adventure medical kit and apply it as soon as you notice irritation (especially on your feet and around your heels and ankles). Moleskin is a thin, heavy fabric made of cotton with an adhesive on one side, allowing you to easily attach it to affected areas as necessary.
Allergies and Bug Bites
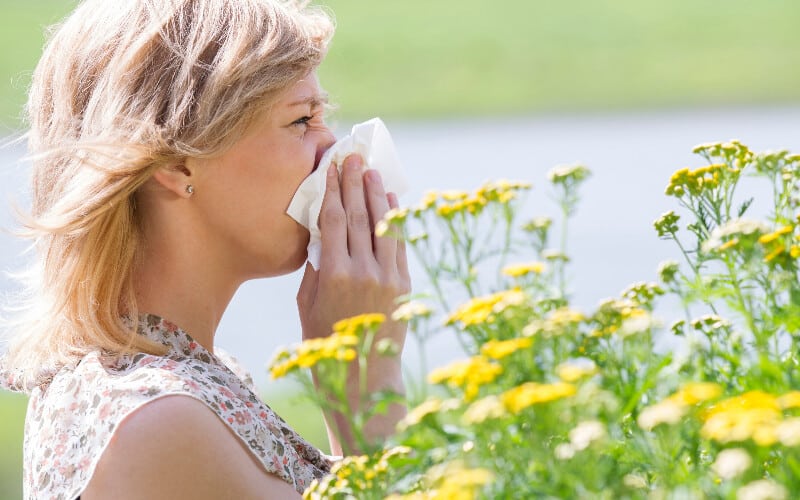
The outdoors can be itchy. From bug bites to allergy-inducing plants, there’s no shortage of reasons to sneeze. Being prepared for various allergies can help make your camping, backpacking, or hiking trip much more enjoyable.
If you or anyone in your group has been prescribed allergy medicine, be sure to include them in your first aid kit. Additionally, there are several popular over-the-counter (OTC) allergy medications you can purchase and include in your first aid kit to fight allergy symptoms as soon as they appear. The most popular options include:
- Diphenhydramine (Benadryl and similar)
- Cetirizine (Zyrtec and similar)
- Fexofenadine (Allegra and similar)
- Loratadine (Claritin and similar)
If you are used to taking any of these, keep them in your first aid kit to help ward off allergies as they start. If you aren’t used to taking any of these, it’s important to note the potential side effects as outlined on the packaging before committing to any specific antihistamine. Headaches and drowsiness are the most common side effects, though more severe reactions including dizziness, nausea, vomiting, diarrhea, swollen face, tongue, throat, and eyes, and more. If you have any underlying health conditions, it’s best to consult with your doctor to discuss your best options, and you may wish to try your preferred medication at home so you can more easily seek medical treatment in case of an adverse reaction.
Insects
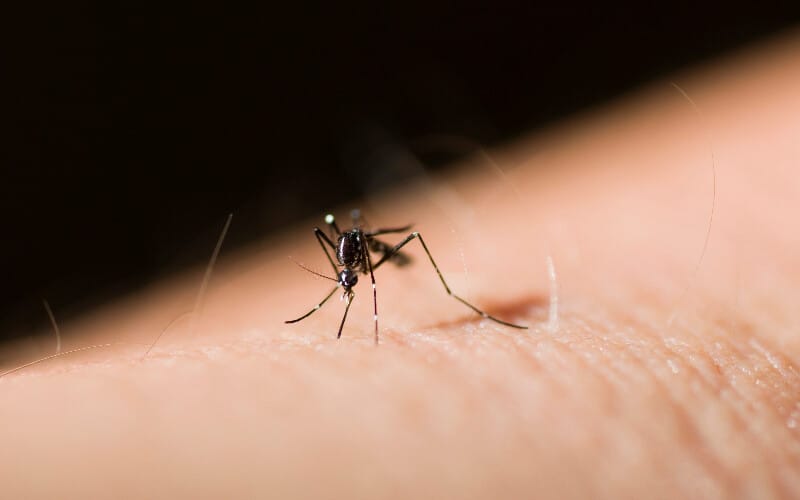
Insect Repellent
A nasty bug bite can ruin an otherwise great outdoor adventure. Depending on what insects are out, a bug bite or bee stings can lead to an allergic reaction. While you can’t keep 100% of insects away at all times, you can take steps to reduce your chances of an incident by following the tips we discuss in our guide How to Repel Mosquitoes & Other Pests.
Insect Bites
In instances where you or someone in your group experiences a bug bite, it’s important to access the situation and act accordingly. If you suspect the bite may be from a black widow or brown recluse, it’s crucial that you immediately seek medical attention.
Most bites will lead to some combination of itchiness, swelling, redness, and/or pain. For bites that cause a mild reaction, simply wash the affected area with soap and water. If there is minor swelling, apply a cold compress or an ice pack wrapped in a clean cloth to help reduce the swelling and alleviate pain. Then apply an antihistamine cream to help relieve the pain and itchiness. Reapply the cream several times per day until the bite has healed.
Sometimes bites can lead to severe allergic reactions. Severe reactions can include a wide range of symptoms, including sweating, nausea, vomiting, cramps, swelling, hives, breathing problems, and/or anaphylactic shock. In these cases, it’s important to call 911 or local emergency services immediately. If you’ve had severe allergic reactions before, keep an epinephrine auto-injector in your kit and use it according to the instructions. If you’re with someone else who is experiencing a severe allergic reaction, ask them if they have a pen and use it.
Have the victim lay down and remain still while elevating their legs until help arrives. If they vomit, turn them on their side to help prevent choking. And if they become unresponsive and stop breathing, begin administering CPR until help arrives.
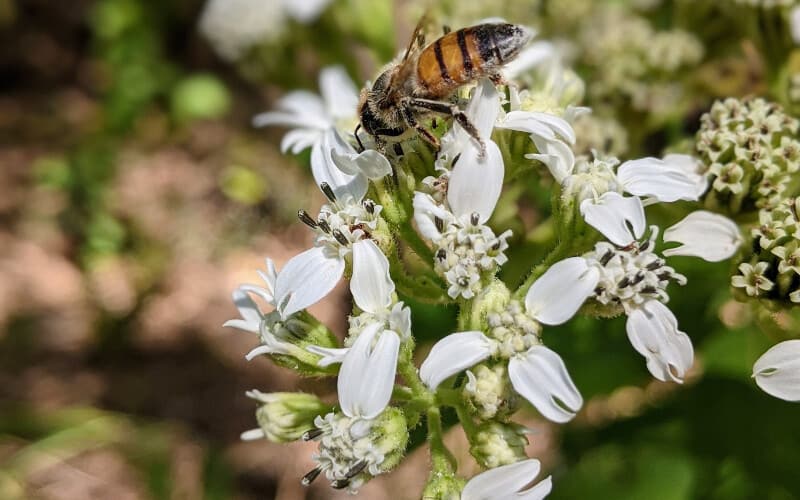
Bee, Wasp, and Scorpion Stings
Wasp stings, bee stings, and scorpion stings can also be painful and potentially dangerous. The steps for treatment are similar to the procedures outlined above, but it’s important to remove the stinger if it’s still stuck in the skin. Use a credit card or other flat object to gently scrape the stinger away. Don’t use tweezers as pinching the stinger can inject more venom into the skin. Once the stinger is fully removed, wash the area with soap and water, apply a cold compress or wrapped ice to the sting for 10-15 minutes to help with swelling, and apply cream several times per day until the sting has healed.
Severe reactions are fairly common with these types of stings, so if you or a member of your party is allergic to these insects and gets stung, it’s important to act quickly and follow the procedure outlined above in the Insect Bites section.
Plants
There are hundreds of species of trees, grasses, and weeds that can cause allergies when you’re out exploring nature. If you or a party member is experiencing a runny nose or stuffy nose, sneezing, itchy or puffy eyes, or an itchy nose, mouth or ears, allergies are a very likely culprit.
Weeds & Grasses
Weeds and grasses are the most common causes of allergies. Some of the worst offenders include: ragweed, ryegrass, and tumbleweed. Research the areas you’ll be exploring to find out which allergy-inducing grasses and weeds you may encounter.
Trees
There are dozens of trees that can cause allergies. Some of the most common trees that create pollen allergies include: cedar, elm, mountain elder, pecan, willow, aspen, birch, and beech trees, among others. Research the trees in the areas you plan on hiking or camping in and know when they produce the most pollen.
Poison Ivy, Oak, and Sumac
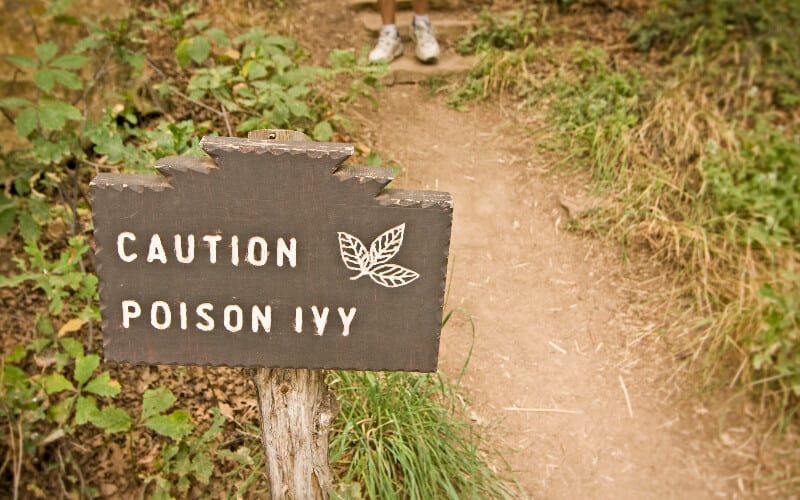
Poison ivy, poison oak, and poison sumac are particularly nasty species of plant life that can cause severe allergic reactions. Poison sumac is generally the worst of the three, but fortunately it grows in swamps and marshes where few people are likely to explore.
If you or a member of your party think they brushed against a poisonous plant, it’s important to act quickly to limit the severity of the reaction. If the exposed member is experiencing difficult breathing or swallowing, contact emergency services (911 or local authorities) as quickly as possible.
Gently scrub the affected area with water and soap for several minutes. If you don’t have access to a surplus of water, wet and rewet a cloth and lather with soap every minute or so. Quickly washing the affected area (within 5 to 10 minutes) can help reduce the severity of the reaction.
After washing, remove any clothes that may have come into contact with the poisonous plant to help stop any further contact.
Applying a cool compress or cold pack wrapped in a clean cloth to the affected area for half an hour at a time can help reduce irritation and itchiness.
Keep anti-itch cream (such as calamine lotion) in your first aid bag to apply to the rash created by the poison ivy (or similar) to help reduce itchiness and irritation.
Rashes from poisonous plants will usually heal on their own within a week or so. If symptoms persist for longer than two weeks, if blisters develop, or if the rash covers a large part of the body, seek the assistance of a medical professional.
Pain Relief
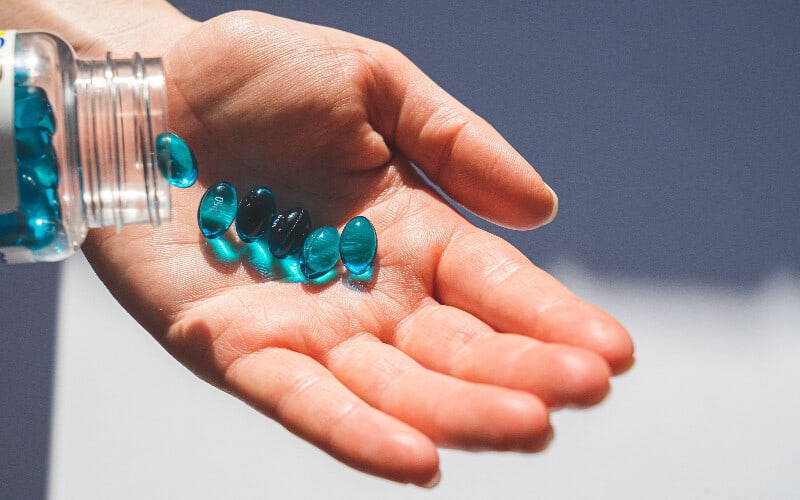
Cool compresses can help alleviate pain for a variety of injuries, but it’s a good idea to include some pain killers in your first aid kit to help temporarily alleviate pain while healing. However, each pain reliever has benefits and drawbacks, so it’s important to weigh your options before stocking your aid kit.
Oral Medicines
Acetaminophen
Acetaminophen is a common choice for pain relief. It works well, but it’s important to note that it can be rough on your liver–plus, it won’t help reduce swelling or inflammation.
Non-Steroidal Anti-Inflammatory Drugs (NSAIDs)
NSAIDs are over-the-counter medicines that are commonly used for pain, and can also help with fevers. These generally work well, but can cause upset stomachs for some. NSAIDs include:
- Aspirin (can thin the blood and may cause bleeding problems, and not suitable for children)
- Naproxen (effective and long lasting–up to 12 hours–but rough on your stomach)
- Ibuprofen (reduces fevers and helps reduce pain, and is generally considered the safest medication in this class)
Topical Medicines
Topical anesthetics can work as quick relief, but these medications can wipe off easily with sweat or water and typically don’t last very long. They also won’t help with inflammation or fevers, so it’s up to you whether you want to include them in your first aid kit. The most common topical creams include lidocaine and benzocaine, and they are useful for bug bites, tooth aches, and minor cuts and scrapes.
Cold & Flu Treatment
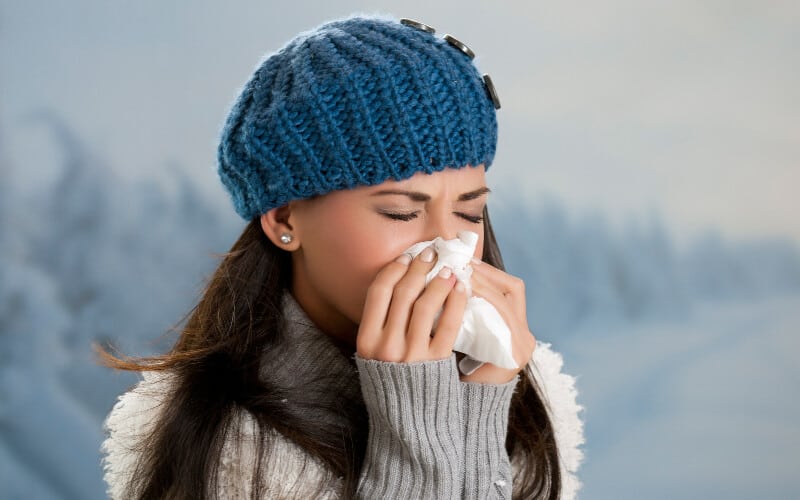
Not only can a cold or flu ruin the fun of your trip, it can quickly spread amongst your group and ruin the experience for everyone. If you’re camping during flu season, be sure everyone in your party has their flu shot before your outing if possible.
If you’re feeling too ill, there’s no shame in ending your trip early. However, if you’d rather try to rid it out it helps to have some over-the-counter medicines in your first aid kit to ease your symptoms until you get home.
If you or someone your with starts to experience a stuffy nose, sore throat, coughing, or a fever and you’ve ruled out allergies as the culprit, it comes in handy to have effective cold and flu medications in your first aid bag, such as:
- Mucinex Maximum Strength
- Vicks DayQuil Cold & Flu
- Vicks Nyquil Cold & Flu
- Delsym Cold & Cough
Snake Bites
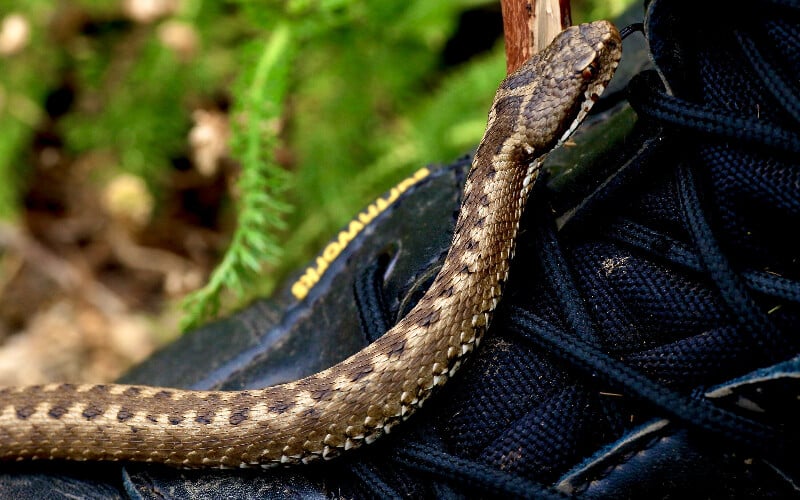
Snakes are another potential threat to keep an eye out for when you’re out camping, hiking, or backpacking. Fortunately, most snakes just want to be left alone and would rather get away from humans instead of biting, unless a person puts them in a position where they feel they must protect themselves (stepping on one, poking them, or otherwise startling them). A couple of genera of snakes in the U.S. (Pituophis: gopher snakes, bullsnakes, pine snakes, etc., and Agkistrodon: pit vipers, cottonmouth, copperheads, etc.) can be extra territorial and may strike, lunge, or hiss if intruded upon.
Nonvenomous Snake Bites
While it’s better to receive a snake bite from a nonvenomous snake than a venomous one, any snake bite should be evaluated and treated to prevent muscle damage and infections.
Venomous Snake Bites
While the vast majority of snakes are nonvenomous, the United States is home to many poisonous snakes that may bite if provoked. Common venomous snakes include cottonmouths (aka water moccasins), copperheads, and coral snakes.
Sometimes a venomous snake may issue a dry bite, which is a bite where no venom is administered. However, any bite should be treated as venomous as a reaction may be delayed.
Symptoms of a venomous snakebite can vary based on what type of venom is injected and how much venom is administered. Common effects can show in as little as a few minutes, to as long as several hours and include:
- Severe Pain
- Redness and Swelling
- Difficulty Breathing
- Blurry Vision
- Profuse Sweating
- And more
When bitten by a snake, it’s important to remain calm (panicking can cause the venom to spread more quickly) and seek medical attention as quickly as possible. Do your best to remember what the snake looked like (color, shape, etc.)–doing so can help get the proper treatment faster… however, in no circumstance should you try to capture the snake.
Lay or sit and keep the bite below your heart level to slow help slow the spread of venom. Use soap and water to wash the bite and cover the affected area with a gauze pad.
Don’t try to suck the venom out, and don’t try to squeeze or drain the bite. Also avoid drinking alcohol (it can thin the blood) or drinking caffeine (it increases your heartrate), both can help the venom spread faster. Do not apply ice, and don’t apply a tourniquet.
Once you’re in the care of a medical professional, they’ll be able to further treat the bite. They may remove the snake teeth if any remain in the flesh, may operate if necessary, and will administer antitoxin and tetanus booster vaccines as needed.
Do Snake Bite Kits Work?
A snake bite kit is not only ineffective, they might actually make a situation worse. Snake venom rapidly spreads after injection, so there’s no way to suck the venom out with a venom extractor. Instead, an extractor may suck the wound shut and push the venom deeper.
Scissors & Tweezers
Trauma Shears
Trauma shears are used to quickly and safely cut and remove clothing to allow for easy access to an injury. If you or a member of your party has a bad injury that leads to a deep cut or broken bone, scissors can help remove clothing without causing further damage.
Tweezers
Keeping a pair of tweezers in your bag can be handy for removing debris such as splinters or glass. As mentioned in the Allergies and Bug Bites section, it’s important not to use tweezers to remove an insect’s stinger as squeezing the stinger may inject more venom into the skin.
Emergency Blanket
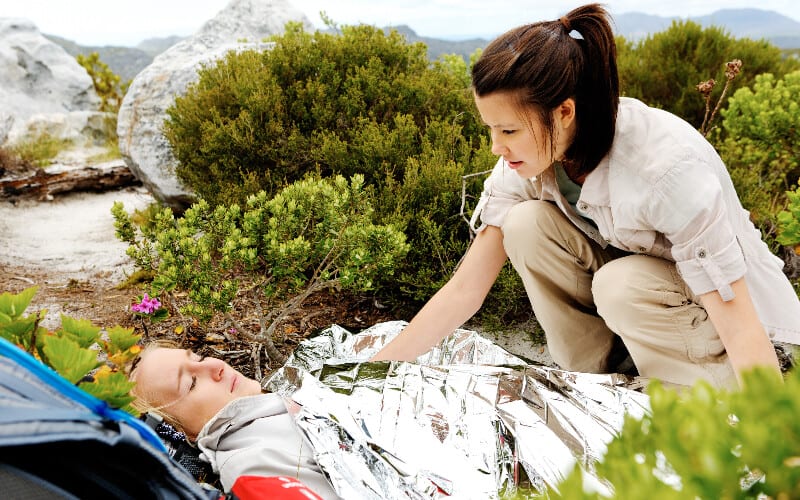
An emergency blanket is a crucial item for any camping first aid kit and can come in handy in several situations. Thermal blankets help prevent heat loss through convection (when cold wind blows across our skin) which can be helpful in regulating a person’s body temperature in the event of a traumatic injury.
These blankets can also help with shock (when there’s not a enough blood circulating throughout the body). When a person experiences a severe injury, it’s not uncommon for them to go into shock. A blanket can help keep a person warm, and warmth helps deter shock. Additionally, these blankets can help a calm a person down which can help improve blood flow to vital organs and bring a body out of shock.
Fractures & Broken Bones
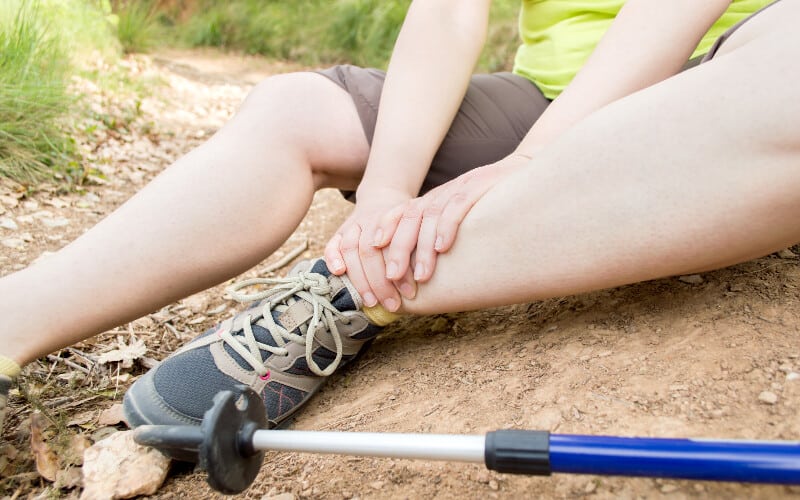
Any activity can lead to injuries of any severity, but more intense outdoor activities, such as hiking and rock climbing, can increase the risk of more serious injuries such as fractures/broken bones. You should include splints in your first aid kit if you’ve been trained how to use them properly for these types of situations.
There’s no difference between a fracture and a break, though “fracture” may sound less serious. A break (or fracture) needs to be treated quickly and properly, and needs to be attended to by a medical professional as soon as possible.
If someone has experienced major trauma during the break, call 911 or the local emergency number immediately. If they aren’t breathing or there’s no heartbeat, it’s crucial to begin administering CPR until help arrives. Similarly, if the bone has punctured the skin, if the limb appears deformed, or if minor movement causes pain, call for help and don’t try to move the victim.
If a neck, back, or head bone is broken the situation may be even more dire, and time is of the essence when it comes to getting professional medical assistance.
Stop the Bleeding
If the area around the broken bone is bleeding, gently apply pressure with a gauze pad or clean cloth to help slow blood flow.
Apply an Ice Pack
An ice pack wrapped in a cloth (don’t apply ice directly to flesh) can help minimize swelling and temporarily relieve pain.
Use a Splint
If the bone isn’t sticking out and you’ve been properly trained, you should use a splint to help immobilize the injury if help isn’t nearby. Doing so can help prevent further damage and provide some comfort.
Treat for Shock
If the patient is displaying symptoms of shock (wooziness, difficulty breathing, etc.), have them lay down with their legs slightly elevated if possible. Use an emergency blanket if they’re feeling cold.
Miscellaneous First Aid Items
We’ve covered the key first aid items you should include in your bag, but there are always other useful items you should add to your camping first aid kit if space permits.
Hand Sanitizer
While you should wear disposable gloves when treating another person’s injuries, hand sanitizer can be a handy way to quickly sanitize your hands before treating your own injuries. When you’re in the wilderness with a limited supply of water, sanitizer can be extremely useful to reduce the chances of infection.
Duct Tape
Duct tape can be used in place of moleskin to help prevent blisters on your feet. The tape won’t stick as long, but will work nicely in a pinch. It can also be used to secure a bandage, though it’s important to ensure the tape is far from the actual injury as it may stick to the skin more than medical tape. It can also be used to fashion a makeshift arm splint by taping the arm to the chest around the shoulder.
Safety Pins
Safety pins are great for securing bandages applied to wounds to ensure they’re snug. They can also be used to fashion a makeshift sling by pinning the cuff of a long-sleeved shirt to the injured persons chest, which can help immobilize the arm and prevent further injury. These pins don’t take up much space and are cheap, so there’s no reason not to keep a few in your first aid bag.
The Best Camping First Aid Kit to Buy
If you would rather buy a pre-packaged first aid kit to save some time and effort, there a plenty of options to choose from. However, not all adventure medical kits are created equally, and it’s important to compare the items each first aid kit has vs the price, quality, and portability to help decide which first aid kit is right for your needs. If you’re a backpacker, compact size may be more important so keep that in mind as you weigh your options.
Best Overall Kits that balance quality vs. price
Best Compact Kits for hiking, kayaking, etc.
No matter what kind of outdoor activity you’re enjoying, it’s important you have a first aid kit nearby in case of emergency. If you’re taking a longer trip, you’ll want to pack more gear for your CPR kit than if you’re going on a short day hike, but it’s better to be overprepared than underprepared.
0 Comments